This is default featured post 1 title

Go to Blogger edit html and find these sentences.Now replace these sentences with your own descriptions.

This is default featured post 2 title

Go to Blogger edit html and find these sentences.Now replace these sentences with your own descriptions.

This is default featured post 3 title

Go to Blogger edit html and find these sentences.Now replace these sentences with your own descriptions.

This is default featured post 4 title

Go to Blogger edit html and find these sentences.Now replace these sentences with your own descriptions.

This is default featured post 5 title

Go to Blogger edit html and find these sentences.Now replace these sentences with your own descriptions.

Showing posts with label CALABARZON. Show all posts

Tuesday, 27 December 2011

HikingBlahs#8: BATANGAS │ (Mt. Gulugod Baboy+Mt. Talamitam Part 2) MT. TALAMITAM: Beautiful Batangas Day Hike

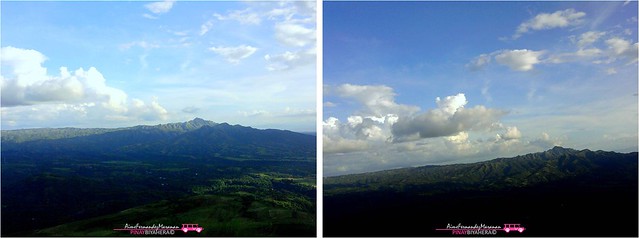
Sun was setting from the slopes of the Mt. Talamitam.
Hiking two mountains in one day was really a challenge. So after hiking Mt. Gulugod Baboy, we went to our next stop, Mt. Talamitam at Nasugbu Batangas.


Several months ago, I noticed this mountain viewed from Kaytitinga I, Alfonso Cavite, I already started mountain climbing that time, and asked my BF, a kinda resident there if it's possible to climb that "unknown mountain" for me back then. Well, most of them, the locals said that there are lots NPAs hiding on that beautiful mountain from afar.


Upon browsing the internet for mountains near Cavite for our 2nd half climb, which are in Laguna and Batangas, I found Talamitam. At first we were thinking where at Batangas this could possibly be, because all I knew was Batulao and that "unknown mountain" that were nearest.


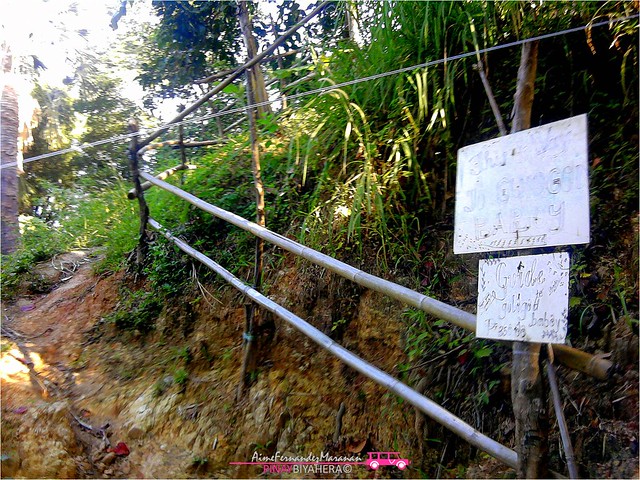
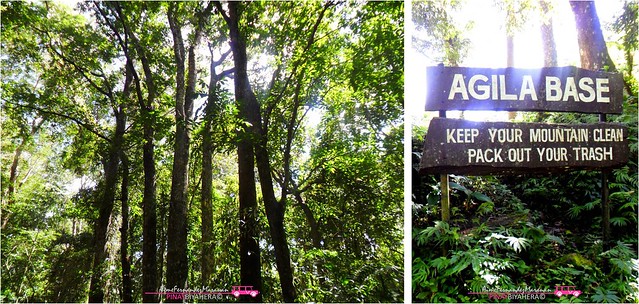
Two hours of travel from Mt. Gulugod Baboy at Mabini Batangas, we finally reached Nasugbu. Upon entrance we turned left and reached Brgy. Aga for 5 mins, then Sitio Bayabasan. You can identify jump-off going to the mountain by simply finding Bayabasan Elementary School on the right side of the road and beside of that is a cemented path going to the registration area and straight ahead to the mountain.
Mt. Talamitam1
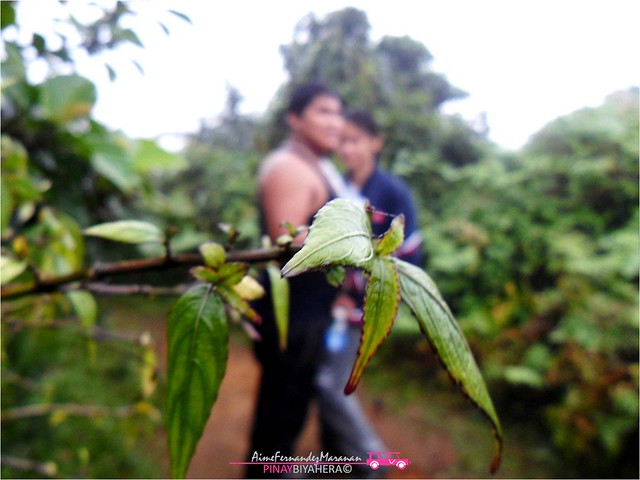
River  on the far right of the trail to Mt. Talamitam.
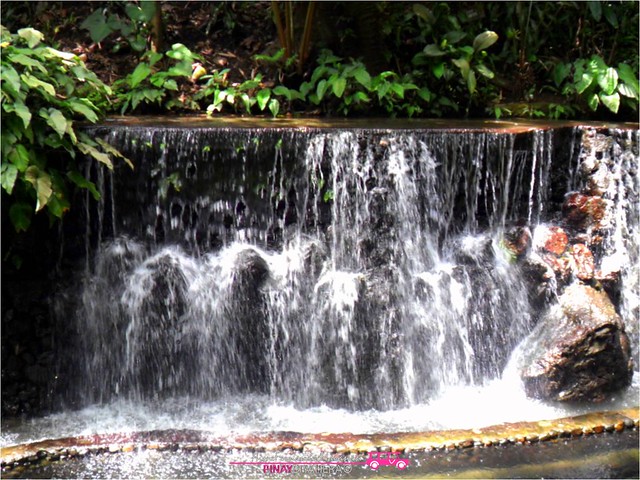
Because we had our car that time, we look for a place where we can park it, however we don't want to left it at the road side so we decided to enter that cemented path and look for a good one. The way was cemented at first but it was cut by a rough road but still we didn't stopped yet until reached the road limit and parked beside a fenced house and continued our journey. After few walks we reached a brgy. hall-like beside residences and registered for P35 each, day or night hike and headed straight ahead. As we continue our trail, I heard and noticed this river along.
Mt. Talamitam3
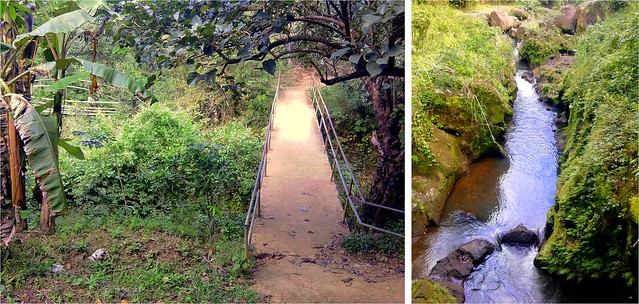
The bridges (left) and the river under it (right) which is the continuation of the river beside the trail.
After a couple of minutes of walk, we reached the two bridges that we had crossed. I was curious about the river and asked if it's possible to freshen up there, my first question back to the registration area. The caretaker say's that they prohibit anyone to go down the river because there females died there last year at a certain part they called "bilog". So I didn't insist anymore and just took a photo it (right).
Mt. Talamitam4
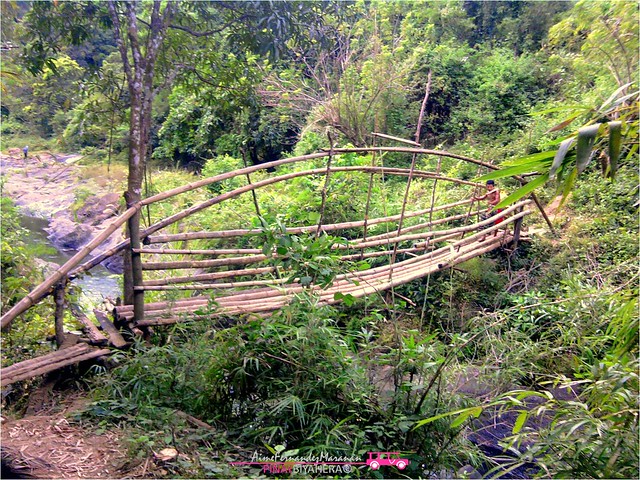
This is the second bridge to cross, just beside the first one.
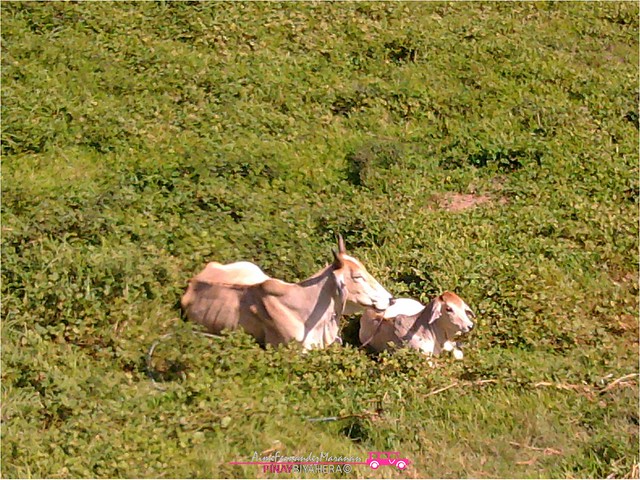
After crossing the bridges, we experienced forested area for almost 30-45 minute walk and then exit to grasslands.  From there we totally felt the burst of sun's heat with no chance of hidding from it. I also notice the cows and horses were getting more and more in number each meter lapsed. They were everywhere and they mooooo very hard that made me scared and made me think they were mad!

Mt. Talamitam6
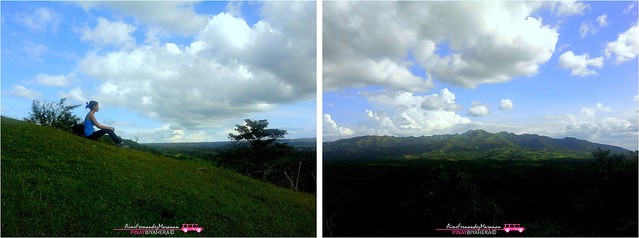
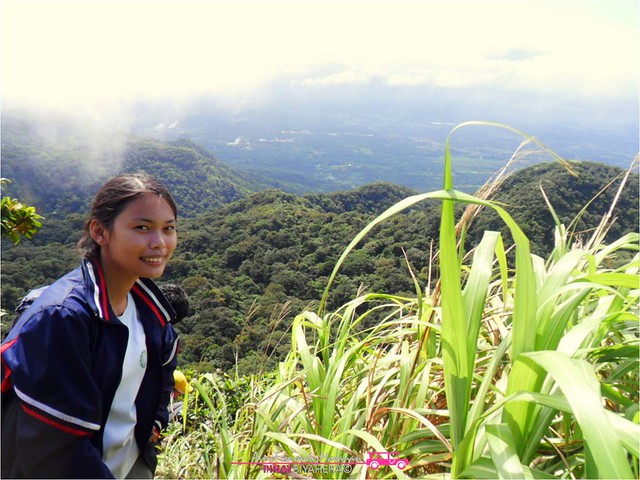
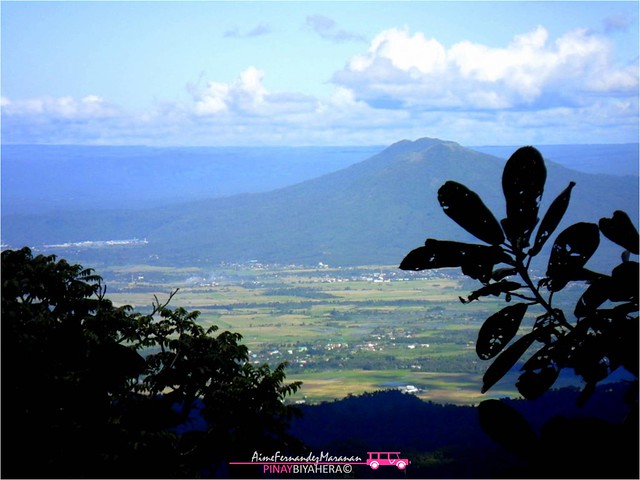
Resting while enjoying Mt. Batulao's view.
Mt. Talamitam 29
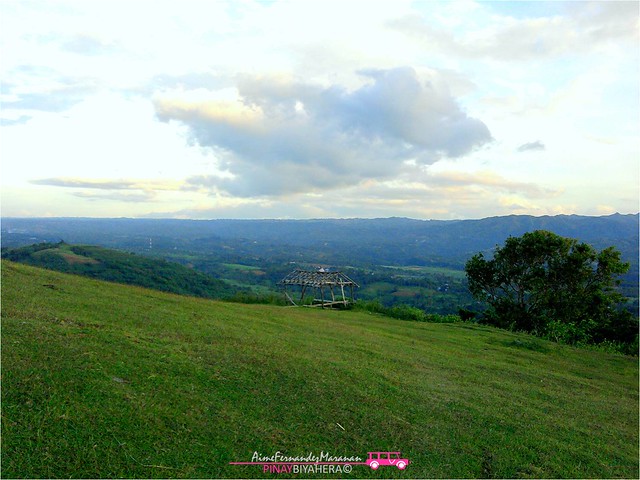
Unshaded shade, just a skeleton. :)
The unshaded hut, but still a help in spite of intense sunlight, a resting spot. From here you can view the Talamitam's perfect landscape for the first time. When we reached this, I found perfect resting place, I can sit well and has a little shade where I can rest my skin from outrageous sunlight through the bamboo frame..haha
Mt. Talamitam8
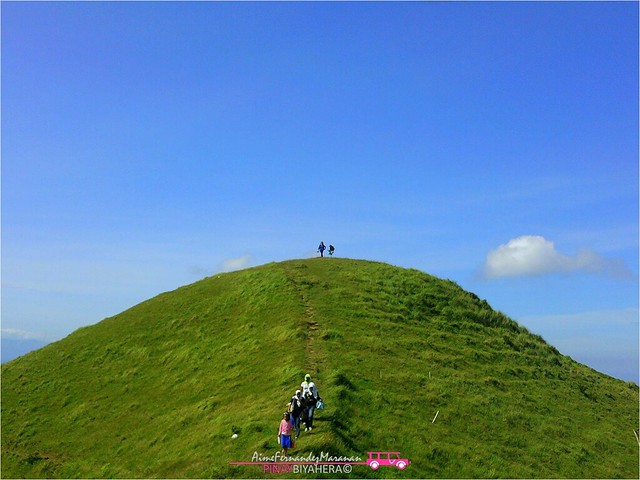
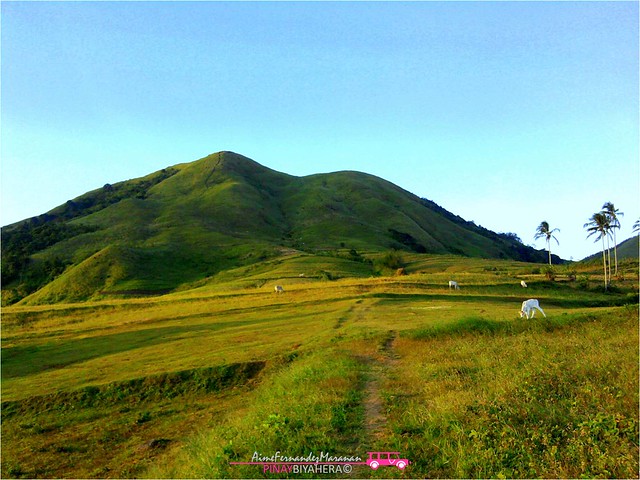
Heading mountain's peak along crops land areas.
Trail was not well defined because of plenty crop fields around the area. Moreover gangster cows and horse are everywhere that we tend to walk distant from them and try other paths to reach the foot of the mountain. In short we made our own trail just to walk away from them, it's not hard to locate the trail to summit anyway. If you think you are lost, just look at the mountain, and walk straight ahead! hehe...seriously! :D


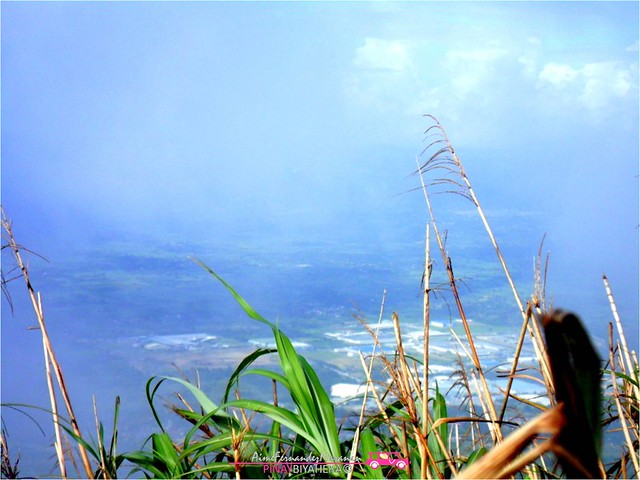
From the mountain's foot, 3 trails going to the summit are visible. If you are going to measure the distance of 3 different trails viewed from the grasslands, you will definitely choose the left one which directed straight ahead to the summit.
Mt. Talamitam 28
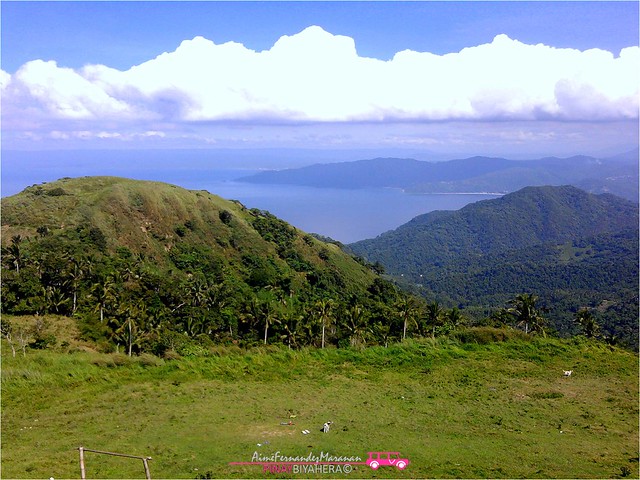
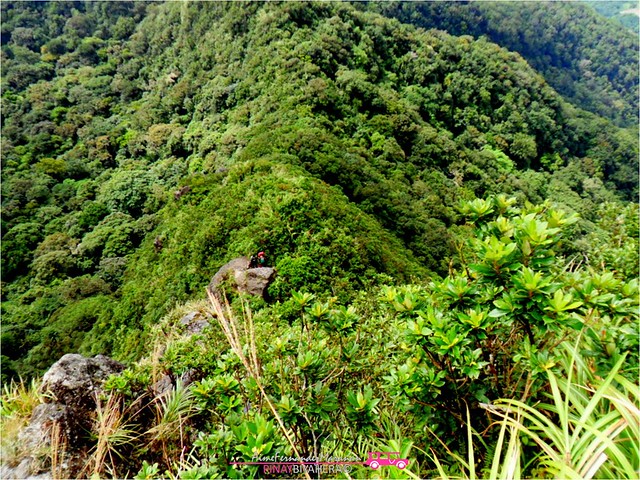
Mt. Talamitam landscape.
After deciding which trail was the best, we took the left trail expecting to reach the top in shorter time without realizing that it is steeper and slippery because of rocks(unticed from afar). Well, after 1 hour of hike from mountain's base, 2 hours in total from the jump-off, we reached the zenith of Mt. Talamitam.
Mt. Talamitam14
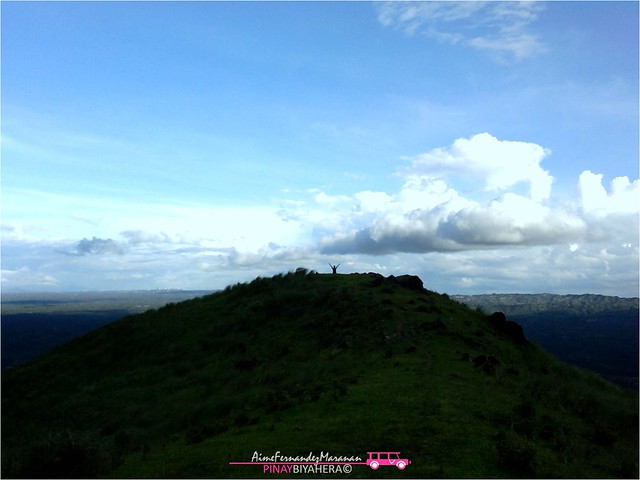
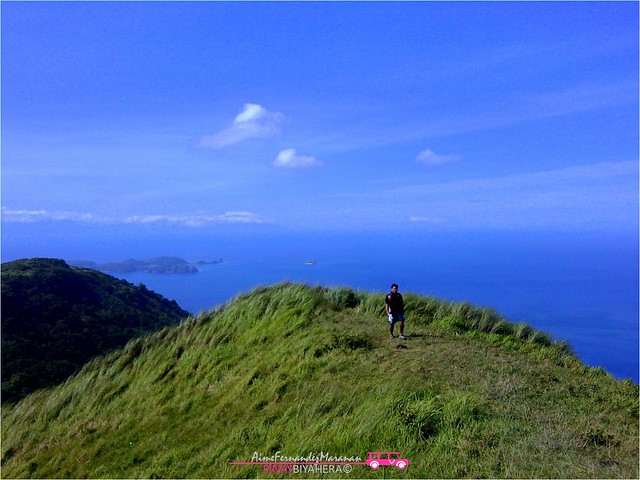
My solo shot at the summit.
I was surprised because there's no one at the peak, just the two of us, me and my bf which was totally nice experience. We were comfortable resting and taking pictures anywhere, anything we want. It was like we owned the mountain.

Mt. Talamitam13
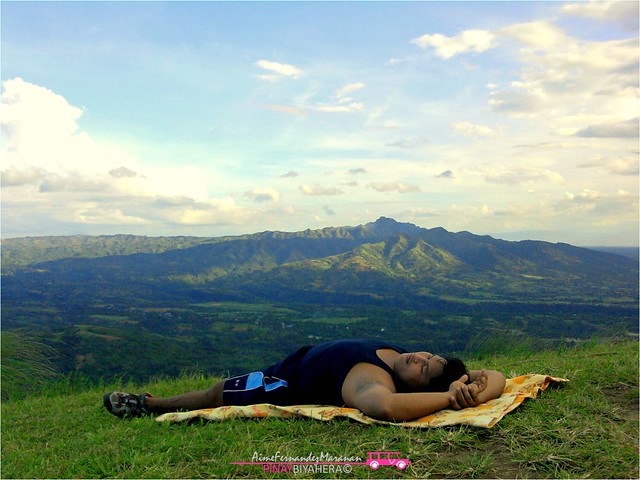
Mt. Batulao viewed from the peak.
Mt. Talamitam 19
More Batulao shots, My first ever mountain to climb.
Mt. Talamitam10
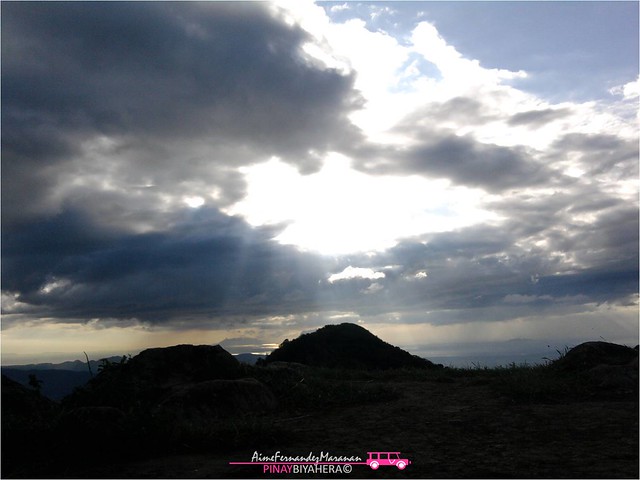
This scene was amazing, it was like Jesus Christ will descend from clouds.
We met a cow shepperd guy at the bamboo shade I mentioned awhile ago in our ascent and he said that temperature at the summit would be totally cold in contrast to what we felt the moment we stepped on the summit. It was like slightly cold temperature but was totally shaded, which amazed me because there were no clouds in our area, they were just around the summit.
Mt. Talamitam11
Mt. Batulao on the left.
Mt. Talamitam12
Batulao on the right.
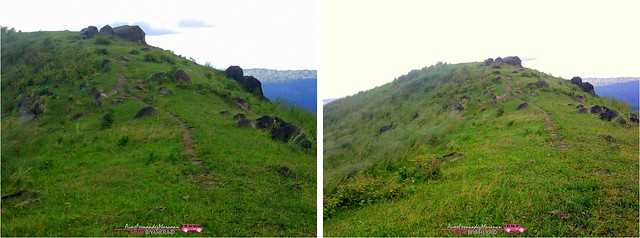
Mt. Talamitam16
Rocky summit.
With curiosity what the whole area was like, I walked distant from the summit where you can pitch some tents, about 5 and took pictures. To avoid night trek in our descent, after 45 minutes stay at the summit, we took the left (middle if viewed from grass land) path for our descent to experience other trail and avoid that steep and slippery way we went in our ascent.
Mt. Talamitam 23
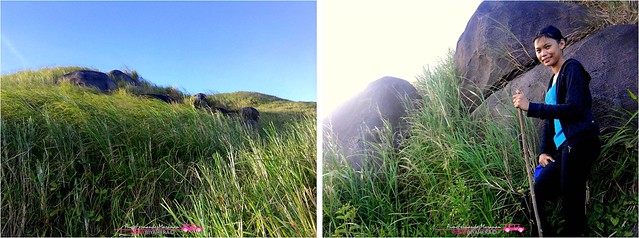
Grasses as tall as a person on the middle trail which we tried in our descent (left). Huge boulders along the trail (right).
Compared to our first trail, path was covered by tall grasses as high as a human and long walk but not steep as the first one we took, perfect for descent. Also, rocks and huge boulders were greatly viewed from here.
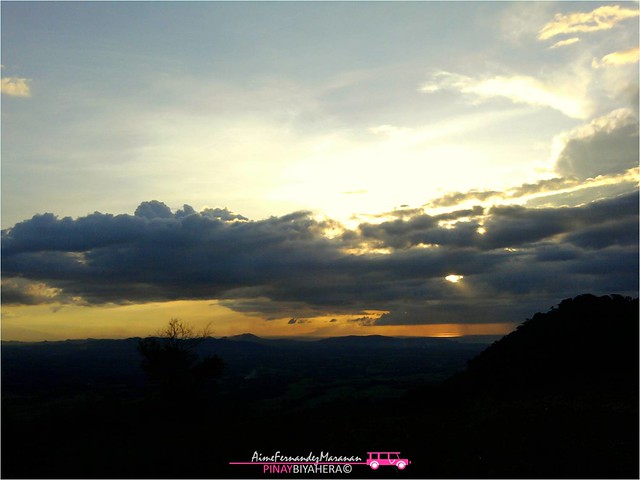
Mt. Talamitam 26
Captured sunset.
Because of fear of benight at trails and possibility of getting lost from branched trails, I haven't had a chance to catch sunset at the summit. When we reached the grasslands and turn our backs to the mountain, I finally saw the mesmerizing sun setting from the right side of the mountain.

November 30, 2011:
 We did two day hikes in one day, just the two of us (me and my bf). Because it was holiday, "Bonifacio day" it fells on a weekday that made summit unpopulated. We owned the mountain that day! That was our 6th mountain and I'm very happy for that and I just started to fall in love with mountain climbing and hoping to conquer more! :)

HikingBlahs#7: BATANGAS │ (Mt. Gulugod Baboy+Mt. Talamitam Part 1) MT. GULUGOD BABOY: The Easiest Climb, Perfect for Novice Climber

Mt. Talamitam.
After searching on web for an easy and Batangas area mountain for our first day hike, I finally found Mt. Gulugod Baboy at Mabini Batangas. Gulugod ng baboy, "Pig's spine" is how they describe this mountain and I kept on imagining how or on what angle this description would really be obvious.


Because it's our first day hike and first time for just the two of us to climb, me and my bf, we decided to bring car for an easier and convenient travel. This is one disadvantage of climbs with few people, more transpo expense. Then after three hours of travel from Dasmarinas, Cavite, spent too much time asking people the right direction,  via private vehicle, we finally found Philpan Dive Resort at Sitio San Teodoro Brgy. Anilao, Mabini Batangas, the jump off.

Gulugod Baboy
Philpan Dive Resort.
Because we're blessed to bring our car in this trek, we were able to skip the cemented very steep road, thanks to "Red" our dearest car rolled its wheels all the way up until we reached this uphill path to the mountain. Well, we can't bring red to peak so we parked and left him beside a store.

Gulugod Baboy14
Way going to Gulugod Baboy peaks, in front of the store. Placard says "This way to Gulugod Baboy", and "Guide Gulugod Baboy P350"
Trail to peaks is quite easy but there are some path going to different houses that made it kinda confusing. You have to pass residences so be courteous. The hardest part here for me were the "gangster dogs", hehe... There were lot's of them, some walked closer to you, barked a lot and looked like they'll bit your leg, but thank God they aren't, they're just expecting you to give them some "tong", food.

Gulugod Baboy13
Along the trek up, try to turn your back and see the amazing view of Batangas' bluish waters and floating Islands from afar including Sombrero Island.
Because of the mountain's grassland state, there are cows graze and roam along the area. Moreover, because of absence of trees upon approaching the mountain, temperature was totally increased and tend to sat and hide myself on tall grasses, hehe.

Gulugod Baboy1
Mother and baby cow.
After forty minutes of walk from where we parked our car, we reached "Pinagbanderahan", (peak 3), place where flag was raised in english.

Gulugod Baboy11
Pinagbanderahan Peak viewed from peak 2.
Gulugod Baboy9
Gulugod Baboy Peak 2, The "gitna" or middle.
Gulugod Baboy7
Panoramic view from Peak 2, with Peak 3 on left side and Peak 1 on right.
Actually when we saw the peaks, we were surprised due to proximity of those to each other, that's why I was puzzled about the itineraries written in blogs with about 40mins to 1 hour of walk...hmmm (?). After taking pictures at peak 2 all by ourselves, we decided to enjoy peak 1, about 10-20 meter distance.

Gulugod Baboy10
Gulugod Baboy Peak 1. Well, It's just me, the grass and the baby tree. Poor plant, it went down by strong winds and dried by too much sun rays.
Gulugod Baboy12
Enticing panoramic view from peak 1, with Sombrero Island and Maricaban Island floating over there. :)
This first day hike was nice, easy and memorable because it's the first time were able to hike without anyone to follow, just ourselves (with fear of chance of getting lost), instincts and the trail. Sometimes its fun to be with your bf/gf in a certain place without any people knowing that you were there, but of course it's also fun in a group hike, getting laud and laugh a lot and most of all you won't have a hard time taking picture all by yourself. . haha.


After taking lots of pictures and experiencing Mt. Gulugod Baboy's peaks, we started our descent and took the same trail in our ascent. Actually We didn't spent too much time at the peaks 'cause we planned to hike next mountain destination for that day, Mt. Talamitam at Nasugbu Batangas.

November 30, 2011:
We did two day hikes in one day, Mt. Gulugod Baboy and Mt. Talamitam, just the two of us (me and my bf). Because it was holiday, "Bonifacio day" it fells on a weekday that made summit unpopulated. We owned the mountain that day! It was our 5th mountain and I'm very happy for that, that made me plan conquer more! :)

SidetripTrips#5: LAGUNA │ BATO SPRINGS RESORT: A Totally Cold Plunge After Mt. Cristobal Climb

Man made waterfalls from Bato Springs Resort.
Bato Springs Resort is totally amazing place due to its natural view and icy cold waters, perfect compliment to summer's heat and long steep trek from Mt. Cristobal. It's highlight of clear, cold,sparkling waters from Mt. Banahaw directed into huge artificially made pools, rivers and falls enhanced by a bridge and a grotto beautifully built near it.

Bato Springs
Grotto above the big man made pool.
When we reached this beautiful resort, we immediately looked for a cottage so we can rest for awhile and cook food. Upon looking for a better place, I appreciated the resort's design and motif.
The well.
Bato Springs2
Nice Comfort Room.
These facilities were stone inspired adorned with lot's of flowers and plants that made the resort unique. Well I'm impress by their comfort rooms. It looks like an open mouthed hippopotamus surrounded by plants and flowers.


Another interesting facility here are their cottages. This kubo (hut) type cottage is perfect for those who usually leave their things unattended, in that time, us who had lot's of belongings from our hike. The room upstairs is lock secured where you can rest for a while or leave things safely.

Bato Springs Cottage
Cottage with Second floor.
Bato Springs3
The Pavilion. Here people who can't go out for a vacation without Videoke will really enjoy this place.
Bato Springs4
Pool for kids.
There are also pools designed for kids, shallow but still nice because of it's man made falls located at it's side. This part is well shaded by trees perfect for those who always prevent themselves from so much sun rays.

Bato Springs1
The biggest man made falls at the resort beside the kiddie pool.
Well the hike was really tiring, brought too much dirt and high temp. feeling. This resort really aid that. But upon dipping myself into it's waters, I immediately went out, haha that was totally cold! It was like "ice-tubig" or ice melted on the pool. So I just decided to watch them taking underwater pictures and enjoying on that tremendous coldness of pool waters. After several minutes and consistent invites to plunge in from them, my bf just pulled me and had no choice. Uhhhh, so cold, I didn't move so I would not feel it's extreme coolness. It was like reverse with other typical resorts, in here when you dip into its waters, you will feel extremely cold and feel warmer upon getting out even if wind blows. Well I enjoyed swimming there especially picture taking on it's beautiful falls of course. :)
Bato Springs Salaginto
Salaginto near the falls..
While were taking pictures at the falls, I saw this Salaguinto silently watching on our photo shoots, hehe. Actually it was my first time to see this creature, it was like greeny in color with tint of gold in normal light condition. However the full goldish color reveals when light hits it's wings which made this insect to be called Salaguinto or "Gold-like"


Entrance Fee (Adults/Child)

Weekdays - P70

Weekends/Holidays - P80

Overnight - P125


Cottages

1 bed for two - P1200 and up

Family Room - P2500 and up

September 25, 2011: 
Bato Springs Resort visit happened after Mt. Cristobal climb to freshen up, . This resort is unforgettable because of it's so much cold waters and beautiful artificially made waterfalls.

HikingBlahs#5: LAGUNA │ MT. MAKILING: Part 2, Very Long and Difficult Descent

Mt. Makiling viewd from Sto. Thomas Batangas jumpoff.
Trekking coming from peak 2, ascended via UPLB trail to the mystical mountain of Mt. Makiling, we continued our descent via traverse trail, right path. It was dense of cogon grass and trail markings (pink, blue and green straws) which were quite unnoticeable.


After approximately 3 hours, we finally reached peak 3. Same as the previous peaks, the whole area was mostly covered by cogon grass and lots of limatics creeping around.

Mt. Makiling16
View from peak 3.
Again continued our journey to Batangas jumpoff where trail was so dense you have to battle your way through, bended forward and a huge leap from a certain rock to another. Upon approaching to Melkas Ridge, we engaged three rope assisted areas, one was 90 degree assault.

Mt. Makiling25
Preparing for the 90 degree descent assisted with 2 ropes.
Mt. Makiling20
Here it is! Actually for me it was really fun and exciting. However, one wrong step and rope maneuver, you'll reach the ground the faster way and no one could save you...So be careful!
This 90 degrees descent was really "buwis-buhay" especially if it's rainy. Steps and ropes would be totally slippery

Mt. Makiling19
Melkas ridge, the last clearing we found, then after this, cogon grass battle again!
Mt. Makiling18
View from Melkas.
Upon continuing, we noticed Limatics were gone, maybe because of the humid temperature in this particular area. Trail was still dense and not well defined you have to engage in long cogon grass battle again. Then we reached a very steep area where you can just hold on to grasses around or just decide to do that power slide all the way down.

Mt. Makiling26
Flower found at peak 3 (left). Carnivorous plant found at near 1/4 end of the trail (right).
Also, in our way down, we noticed this cute plant known as Pitcher plant. This is a carnivorous plant whose prey-trapping mechanism features a deep cavity filled with liquid. And then pokemon character came in to my mind, "Victreebel".


After 5 hours from peak 2, we reached finally the jump-off. We're really dirty and thirsty due to absence of water supply along the trail. We thought we could get water immediately as soon as we got there.. But unfortunately, it didn't happened. There were no locals around, just a ranch with no one inside. After 30 mins, the ranch care taker came and allow us to get plenty of water and clean ourselves. After cleaning up and gulp lots of water from the mountain source, we then off to meet other members of the group and eat a lot! As in a lot, because we haven't took our lunch and miryenda for that day.

October 23, 2011:
My 4th mountain climb started at UPLB trail (October 22, 2011) and continued through traverse trail for descent (October 23, 2011) which was totally "trahedya", tragic! We experienced los of cuts, limatic bites, grass irritations and buwis buhay rope assisted assault. However, If you're planning to have Mt. Makiling Climb, I suggest you start with UPLB trail for ascent (easy) and Traverse Trail for descent, because it is so steep it is much more harder if you you'll do it in your ascend. Moreover this trail has some parts that were eroded, so bring rope and knife so you can arrange it for yourselves. But if you are planning to experience side trips in UPLB like mudsprings and flat rocks, you might choose Traverse trail to start or ascend and descend via UPLB trail.

HikingBlahs#4: LAGUNA │ MT. MAKILING: Part 1, Long Yet Easy Trail

Mt. Makiling rainforest park trail.
Mt. Makiling the mystical mountain in Luzon, home of Maria Makiling, the "diwata" or fairy who believed to be taking care of all the mountain's rich resources from fauna, faura to waters. Like everyone knows about the mountain's legend, it's slopes forms a female shape lying on the ground. This inactive volcano attracts mountaineers and nature trippers to enjoy and experience the great naturals it posses.


If you are coming from Manila, take a bus from buendia to Los Banos, Laguna, P99 each and rent a jeep to UP Los Banos, P15 each. On the other hand, me and my bf came from Cavite, so we went there through van from Pala-Pala in front of Robinson's Dasmarinas to Los Banos about 1 hour for P95 each then a jeepney, P8 to the said University.

Mt. Makiling Map
Trail map to Summit (station 30)  and safety reminders for trekkers. 
Saturday morning at UPLB jump-off, we started the trail about 10:45 AM, we registered and pay P10. They gave us the trail map (left) and off to trekking without a guide. The group decided to take UPLB trail to summit and traverse trail to Santo Thomas, Batangas in our descent. Advantage of this would be much easier ascent and even the traverse is quite harder, steep trail was not so much a problem, and disadvantage would be not able visit side trips in UPLB like mud springs and flat rocks.

Mt. Makiling9
Nice arrangement of those tall slender trunks.
 Based on the Trail Map, there are 30 stations. On stations 9 and 10, food and water refill are available. After 3 hours of walk, we reached the first food station and took our lunch. We brought pack lunch and some just bought food there and drinks they want, soft drinks if you wish. :)

Mt. Makiling Agila Base
After 30 mins, we reached Agila base.
Mt. Makiling Snake
The dead snake found was stabbed with knife.
After taking care of our grouching stomachs, we started our trail to campsite again. In our hike up, we saw this beautiful creatures along our way. The snake on the left was found dead, I don't know how but it was obviously killed intentionally based on it's wounds. On the lower right, cute orange millipede resting along our way.
Mt. Makiling8
Fungi...Mushroom...
Mt. Makiling Limatik
Limatic traversing. :)
Like any other rain forest, Mt. Makiling's famous small but terrible creature "Limatik" resides and infest in this particular trail, UPLB. It's really scary because this blood sucking thing might get into your skin, eyes or ears without noticing it. When it gets into your skin and the "sucking" process happens, the wound made will continuously bleed upon removal. Moreover, it's kinda slippery so others can't get it off and immediately panic!

Mt. Makiling7
Strange tree.
Along the way, I was amazed with this tree. First, It was my first time see this kind.. Second, I it is so unique for it's white fur-like spikes all over it's branch. If you will able to see it and have wild imagination, you could imagine that this might move and act living creature! hehe. Meanwhile, I just then realized when I saw camping areas along the trail that It took us awhile to find a better campsite with a wider area because we had 6 tents.

Mt. Makiling5
Scenic view from trails.
 Finally, after 4 hours of hike from the food station and being paranoid about the Lumatiks, we found a campsite that would fit us. It was really tiring and until that point we were concerned about the leeches, so we had to fix everything that would help our tents things to avoid it. We had to remove dried leaves, avoid submerging our tents near plants/ grass and provide enough light to see those suckers.


We break the camp 6:00 AM and started our trek to peaks.

Mt. Makiling13
Rope assisted ascent (left). Bamboo ladder leads to Peak 2.
It took us 3 hours to reach and enjoyed peak 2. The area was mostly covered with dense grass/plants and trees.

Mt. Makiling12
Peak is so much dense of plants and tall grasses, you wouldn't see the view hidden behind those. Also, this area is highly infested of limatics.
October 22-23, 2011:
Mt. Makiling4th Mountain to beat. We used UPLB trail to summit but battled traverse trail in our descent to Sto. Thomas, Batangas. Limatiks greatly infested the previous trail and luckily haven't sucked by those. :). Meanwhile they were absent on the second trail, maybe due to it's surroundings' condition and temp which is kinda dry and humid.


If you are planning to hike Mt. Makiling, I suggest you do day hike in contrast to us, which was overnight. Overnight hike might be a nightmare, First, campsites were highly infested by limatics. Second, you might be paranoid if those sneak into your tents and feast on their bountiful host or get into your food while you are eating. hehe. Remember they came from everywhere, any direction.

Pinay Biyahera Headline Animator

Related Posts Plugin for WordPress, Blogger...
Twitter Delicious Facebook Digg Stumbleupon Favorites More